 Post by
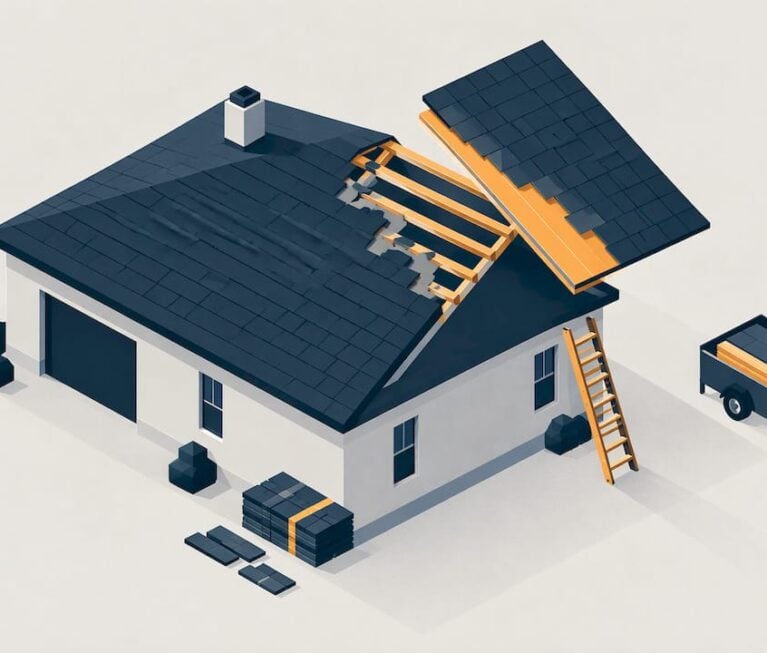
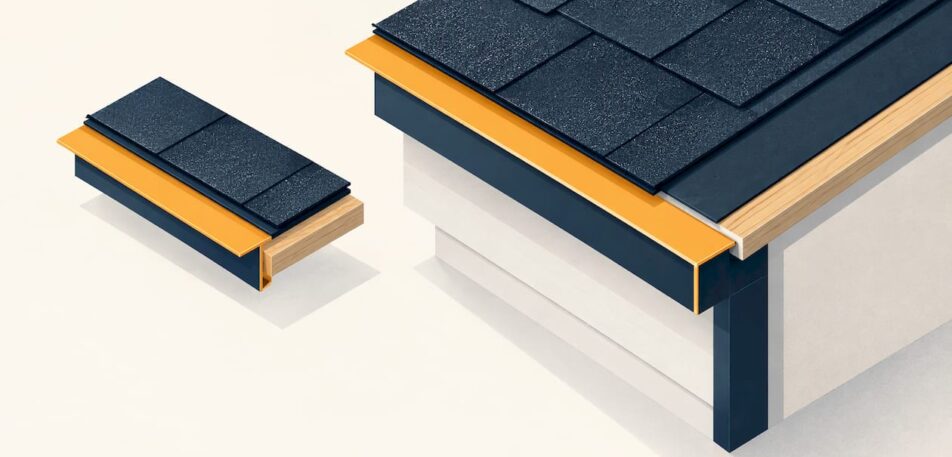
Drip edge is a strip of bent metal that runs along the eaves and rakes of a roof, and it is installed in a set order: at the eaves it goes on the deck first and the underlayment laps over it, while at the rakes the underlayment goes first and the drip edge goes over it. Getting that order, the overlaps and the nailing right is what keeps water out of the wood along your roof’s edges. On a roof replacement, a licensed crew builds it into the job from the start, and we do the same on every roof installation we complete in Florida and Missouri.
TL;DR
- Drip edge sheds water away from the fascia and deck edge, so the wood under your shingles does not rot.
- Eaves: drip edge under the underlayment. Rakes: drip edge over the underlayment. Mixing these up is a common mistake.
- Typical specs: at least 2 in. of overlap between pieces, 2 in. back onto the deck, nails into the top flange only, and tighter nail spacing in high-wind areas.
- It is easiest to do correctly during a re-roof, when old shingles and underlayment are already off.
- Check your local code and your shingle manufacturer’s instructions, because they set the final numbers.
Table of Contents
- What drip edge does
- The layering order at eaves and rakes
- Drip edge installation, step by step
- Quick reference: common specifications
- Drip edge with metal roofing
- Adding drip edge to an existing roof
- Why the details matter for different owners
- Our perspective
- Have your roof edges done right
- FAQ
- Sources
What drip edge does
Drip edge is corrosion-resistant metal flashing, which means a thin shaped strip that directs water. According to the Asphalt Roofing Manufacturers Association (ARMA), it limits wood rot caused by water getting under shingles, sheds water at eaves and rakes, and gives the first shingle course a clean, straight edge. The eave is the lower edge of the roof, and the rake is the sloped edge at a gable end.
Fine Homebuilding explains the physics: the metal keeps water from being pulled by capillary action (water creeping along a surface) back under the shingles or sheathing. It also protects sheathing edges from gutter splashback and ice dams.
The U.S. Department of Energy’s Building Science Education Center notes that even small roof breaches can cause extensive storm damage, and that drip edge over underlayment at all eaves and rakes helps lock the roof in against moisture. For homes in Florida’s hurricane zones and Missouri’s storm belt, the edges are where wind gets its first grip, which is why this thin part gets attention.
The layering order at eaves and rakes
The sequence is the part most people get wrong. ARMA gives the general rule: drip edge goes underneath the underlayment along the eaves and over the underlayment on the rakes.
There is a reason for each. A code explainer from Jaspector describes it this way: at the eave, water arrives from above, so underlayment over the metal captures water running down the deck. At the rake, water arrives from the side as wind-driven rain, so metal over the underlayment sends any water that gets in onto the underlayment instead of behind it. It also calls using the same sequence at both edges the most common installation error.
| Edge | Drip edge position | Why |
|---|---|---|
| Eave (bottom) | Nailed to the deck first, underlayment laps over it | Captures water running down the deck |
| Rake (side) | Underlayment first, drip edge nailed over it | Sends wind-driven water onto the underlayment |
When self-adhering underlayment is used at the eave and the code and manufacturer allow drip edge over it, ARMA describes first placing a 12 in. strip of self-adhering underlayment so the metal sits between two plies for ice-dam protection.
Drip edge installation, step by step
Here is the routine as a roofer works through it on a re-roof. At each step we note where it commonly goes wrong.
1. Prepare the edge
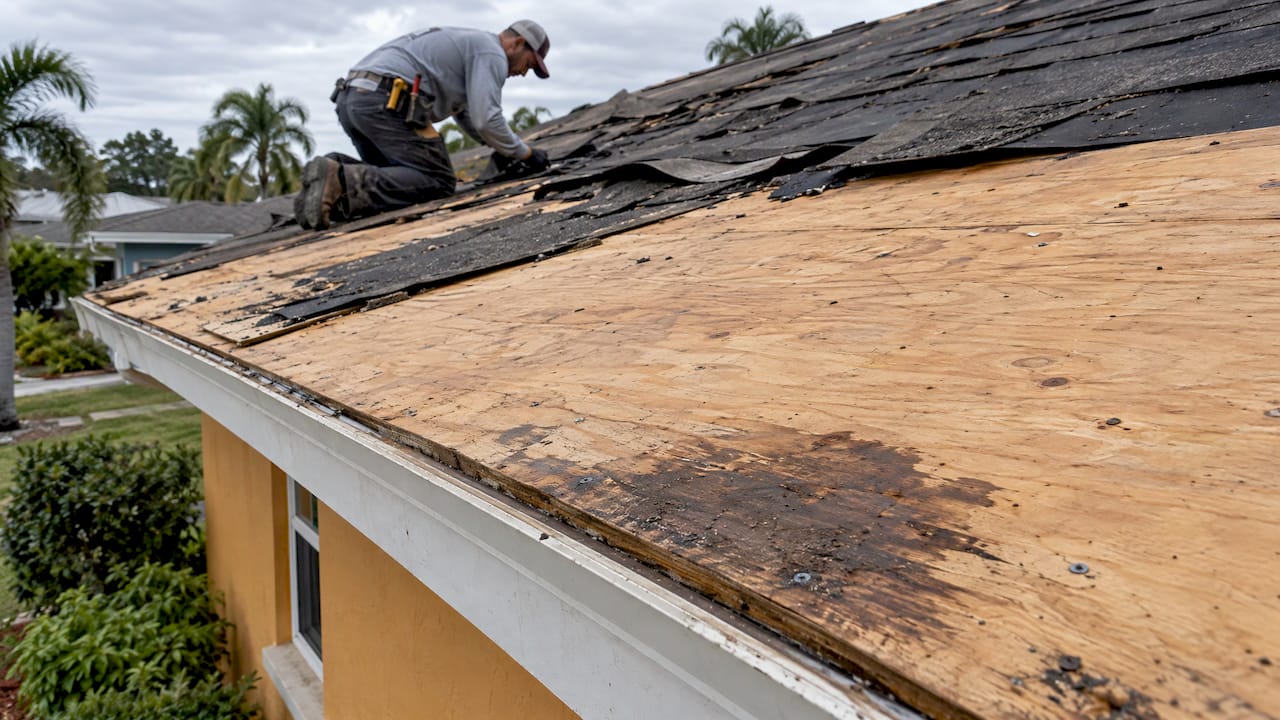
Strip old material and inspect the deck edge. Lowe’s guidance for installers is to inspect and repair the roof edge and clear debris before installing. Soft or stained sheathing at the eave is a sign of past water, and it should be replaced before metal goes over it. This is the step that separates a cosmetic job from a lasting one, and it is one reason we look at the whole roof edge during a replacement rather than only the shingles.
2. Choose the right metal and size
The 2024 International Residential Code (IRC), the model building code many U.S. jurisdictions adopt, calls for corrosion-resistant metal. Jaspector’s summary of Section R905.2.8.5 lists 26-gauge galvanized steel or 0.016-in. aluminum as compliant. GAF’s Pro Field Guide likewise calls for non-corroding aluminum or galvanized steel.
Mixing metals can cause corrosion where they touch, so the drip edge, nails and neighboring flashing should be compatible.
3. Install the eaves first
Start with the eaves. Nail the metal to the deck, then lap the underlayment over its top flange. The ARMA bulletin says the metal should extend at least 2 in. onto the sheathing and ¼ in. below it, with an outward-bent kickout flange at the lowest edge so water drips clear of the wood.
Overlap each piece with the next. EDCO’s product bulletin specifies a minimum 2 in. lap, and IKO’s CodePlus guide calls for 3 in. Use the larger figure when the manufacturer of your shingles requires it.
4. Roll out the underlayment, then do the rakes
Install underlayment to the deck edge, then nail the rake drip edge over it. Start at the lower rake corner and work uphill, so each upper piece overlaps the one below. At the corner, Fine Homebuilding describes the rake piece overlaying the eave piece, with the vertical leg slit so it bends over the eave leg.
5. Fasten it correctly
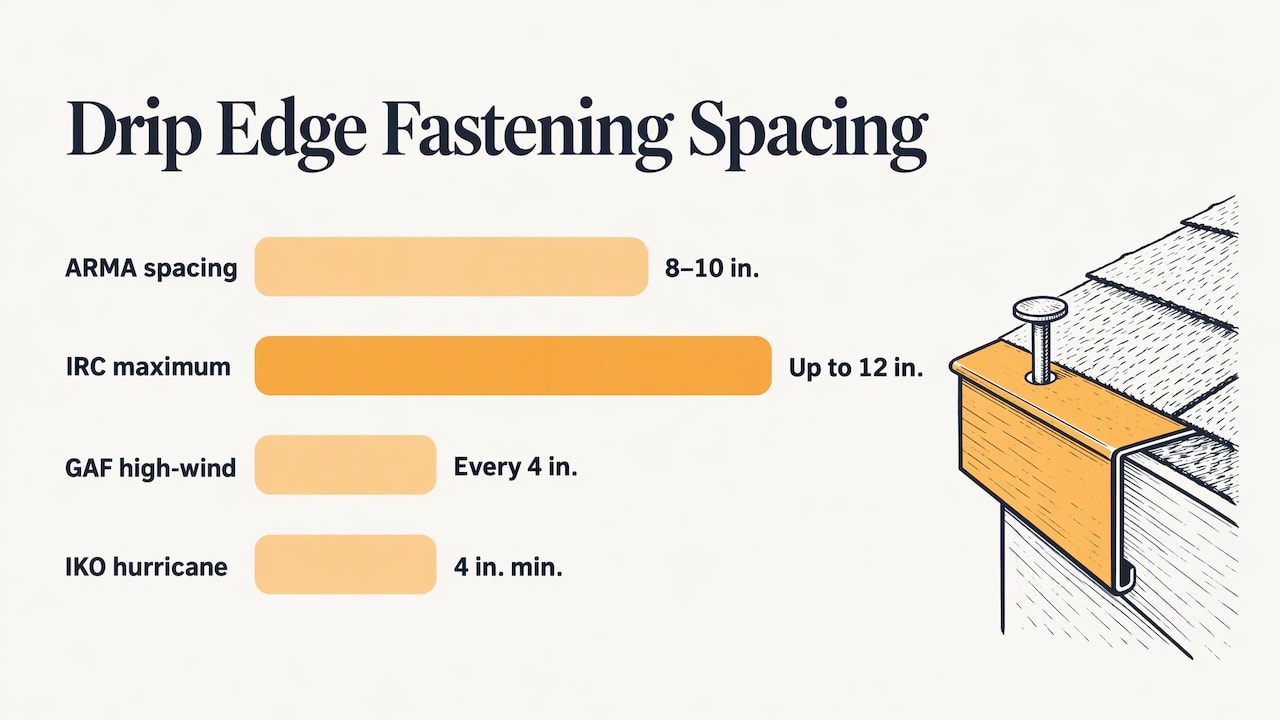
Nails go through the top flange, never through the vertical face into the fascia. ARMA says to nail 8 to 10 in. on center into the deck. The IRC allows up to 12 in., and that is the maximum spacing in the City of Laramie’s 2026 roofing bulletin.
In high-wind areas the spacing tightens. GAF says to nail every 4 in. in high-wind areas, and IKO’s guide sets a 4 in. on-center minimum in Hurricane Zones. That matters across Florida’s coast. Fastening details for high-wind roofs are also covered in an engineering guide on reinforcement and fastening for solar roof installations.
Do not overdrive nails. EDCO notes leaving 1/32 in. of clearance so the metal can expand and contract with temperature.
6. Set the shingles over it
Starter and field shingles sit on top. With a standard 90-degree L-shaped profile, ARMA says shingles should extend ¼ to ¾ in. beyond the drip edge. The lower leg should land inside the gutter, and gutter hangers should not be driven through the drip edge flange.
Quick reference: common specifications
| Detail | Typical figure | Source |
|---|---|---|
| Onto the deck | At least 2 in. | ARMA |
| Below the sheathing | ¼ in. (IRC); ½ in. (IKO, DOE) | Laramie bulletin |
| Overlap between pieces | 2 in. minimum (3 in. in high-wind guidance) | DOE |
| Shingle overhang | ¼ to ¾ in. | EDCO |
The differences between sources are normal: codes set a floor, and manufacturers and wind-resistance programs ask for more. Your local building department and the shingle maker’s instructions decide which applies to you.
Drip edge with metal roofing
Metal roofs also need edge protection. The Building America Solution Center at PNNL recommends code-compliant metal drip edges at eaves and rakes. For metal assemblies it adds a loose-laid slip sheet, typically building paper, between the metal roof and the fully adhered membrane to allow for thermal movement, plus a continuous cleat to mechanically attach the metal panels. Panel profiles vary, so the order of trim, cleat and panel should follow the panel manufacturer’s instructions.
Adding drip edge to an existing roof
It can be done, but it is not a quick add-on. Fixr notes that roofs built after roughly 2012 should already have it, and that retrofitting under existing shingles is complicated. Metal has to slide under the underlayment at the eaves, which means lifting shingles and underlayment along the edge. In practice, the most cost-effective moment is a re-roof or a repair that already opens the edge.
If your roof has no drip edge, shows rotted fascia, or has water stains at the eaves, ask for an assessment. We handle roof repair, including flashing and sealant work and fascia and soffit repairs, and our guide to roof flashing repair explains the related causes and timing.
Why the details matter for different owners
Homeowners. Edge failures usually show up late, as rotted fascia or stains on soffits. A correct installation during a replacement is far cheaper than repairing hidden wood later.
Property managers and business owners. Edge metal on low-slope or mixed roofs follows the roof system’s manufacturer details. Commercial roofs are covered by our commercial roofing services, including replacement and preventative maintenance plans.
Developers. Specifying drip edge with the right gauge, laps and fastening in the plans keeps inspections smooth, since code officials look at the edge details.
Our perspective
Drip edge is a small part that shows how a roof was built. When we replace a roof, the edge metal, the underlayment order and the nailing pattern are part of the project scope, not extras.
Florida’s hurricanes and Missouri’s storms test the edges first. We build for those conditions with licensed and insured crews, and we explain the scope and the estimate plainly so you know what goes on your roof.
If you are unsure whether your roof has drip edge or whether it was installed in the right order, that is a good question to bring to a roof inspection.
the author
Have your roof edges done right
GenX Roofing installs, repairs and upgrades residential and commercial roofs in Florida and Missouri, with licensed and insured crews and estimates built on honest, transparent communication. See our roofing services or contact us through genxroofing.com to talk through your roof.

FAQ
Is drip edge required by code?
Under the 2024 IRC, drip edge is required at the eaves and rakes of shingle roofs, per Jaspector’s summary of the section. Local jurisdictions adopt and amend codes, so confirm with your building department.
Does drip edge go under or over the underlayment?
Under it at the eaves and over it at the rakes. ARMA’s bulletin states this rule. The reasons come from the direction water travels at each edge.
Can I add drip edge to a roof that already has shingles?
Sometimes, but the shingles and underlayment along the edge must be lifted to slide the metal in. Most owners find it simpler to include it in a replacement or repair.
What size and metal should drip edge be?
The IRC lists 26-gauge galvanized steel or 0.016-in. aluminum, and manufacturers such as GAF accept aluminum or galvanized steel. It should extend at least 2 in. onto the deck.
Sources
- ARMA: Installation of Drip Edge at Eaves and Rakes
- ARMA technical bulletin (PDF)
- Fine Homebuilding: Drip-Edge Flashing
- DOE Building Science Education Center: Drip Edge
- Jaspector: IRC 2024 Drip Edge Flashing
- EDCO technical product bulletin
- IKO CodePlus Application Guide
- GAF Pro Field Guide
- City of Laramie Bulletin 30: Roofing Assemblies
- Lowe’s: How to Install Drip Edge
- PNNL Building America Solution Center: Roof Edge Protection
- Fixr: What Is Drip Edge
Recommended
- Why Choose Professional Roof Installation Services Tampa Bay?
- Why You Should Never Ignore a Small Roof Leak
- Roof Leak Detection: How to Find the Source and What Comes Next
- Roof Repair